Following the Highland Trail video posted last week, I thought I’d provide some insight into how I approached the filming, what kit I took, what settings I used and so on.
A few people asked me before the race:
Why would you want to waste time filming when you should be racing?
While the Highland Trail appealed to my competitive instincts, I felt I wasn’t quite on the same form as last year, and the challenge of creating a short film appealed to me. The event had proven popular for non-riders too, and this was a chance to show everyone not racing what the Highland Trail was really like. Besides that, it was a suitable distraction from the sharp and committing end of the race. That said, I deliberately didn’t want to spend ages setting up off-bike sequences. I recognised the benefit of including some in the film, but I still wanted to get in a good distance each day, take a short sleep strategy and portray the impact that has on the rider.
The Camera
Up until last month, all my films have been shot using a Contour +2 HD video camera; either helmet or bar mounted, or off-bike on a tripod. When I first acquired a video camera last year, it was a toss up between the Contour and the GoPro Hero3. Comparisons between footage of both cameras seemed to show next to no difference in quality and on finding the Contour at a good price (bearing in mind the Hero3 was still quite new and suffering from some early firmware glitches), that’s what I went for. Whilst I’ve enjoyed using it – and there are some areas where the Contour is better than the GoPro in my opinion – it does have one limitation in that you can’t chest-mount it like you can with a GoPro. Unless I do my helmet strap up so tight I can’t open my mouth, I’ve never managed to get consistently good POV footage from the Contour due to excessive shake off the helmet.
For the Highland Trail, I knew that for speed of gathering footage the vast majority of filming needed to be made on the bike. I think is where the main win for the GoPro is – the chest-mount. It so happened, that the Hero3 recently got a refresh to the Hero3+ with a new lens, new waterproof case, longer battery life, better low light performance and crisper image quality. About 10 days for the Highland Trail kicked off, I committed and bought a Hero3+. I left it a bit late in the lead up to the race, as I only had one opportunity to take it out to test its capabilities, but using the standard GoPro chest harness, I found I could get good quality footage over rough terrain without a problem – something I couldn’t have got with the Contour.
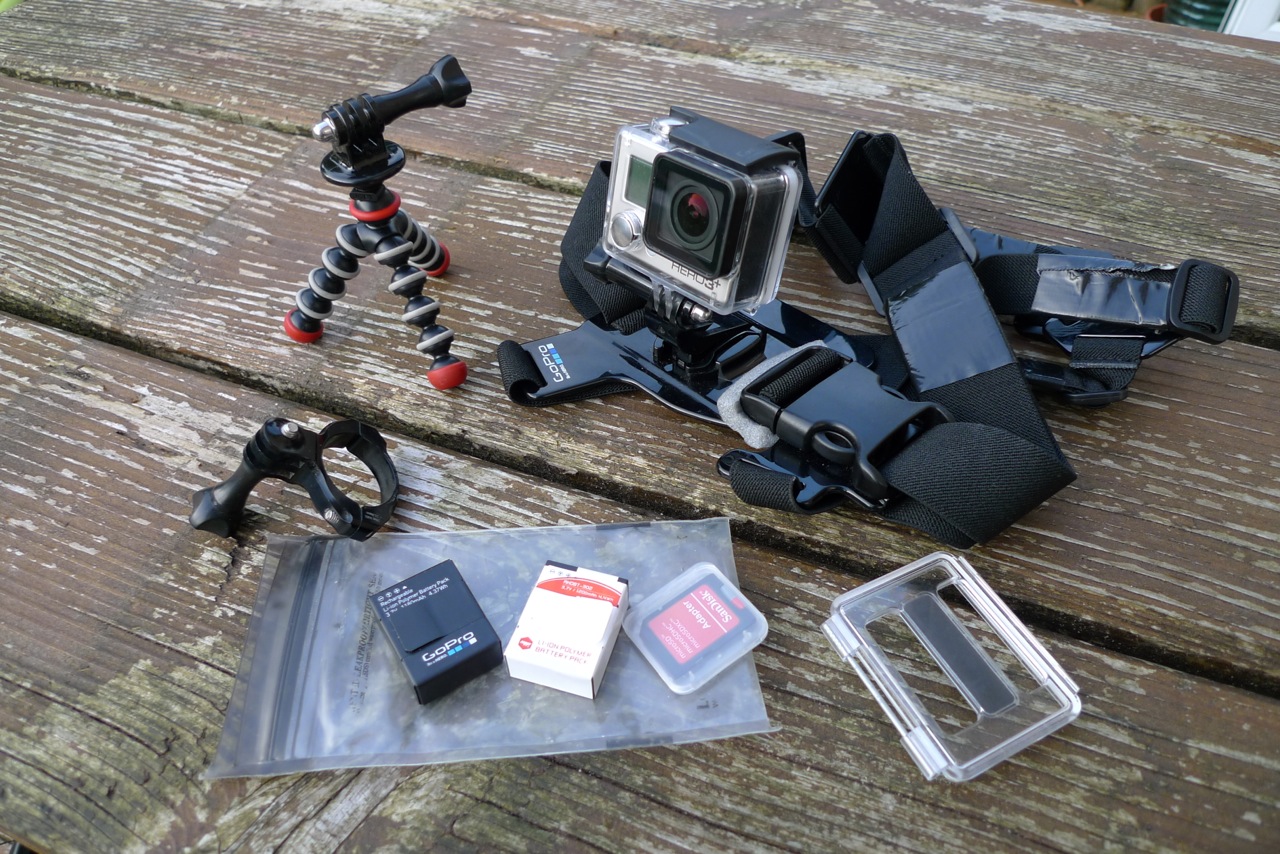
I also took to spare batteries, two 32Gb microSD cards and the skeleton back for the case to give me some flexibility in recording sound. All this sat in a aLokSak waterproof bag. In all, everything weighed 504g, though as the majority of the weight was mounted on my body, it didn’t seem that substantial.
The Mounts
I decided I’d go with three possible mounting positions. Chest, bike, and external tripod. The Chest harness was worn most of the time and was the default location for the camera so I could grab footage at the press of a button.
The mount on the bike (a K-Edge GoPro adaptor) was for recording any dialogue I wanted to take while on the bike. It was fitted to the front loop of the Jones H-Bar. I actually only used this the once, which appears in the video at the start of Day 2.
The tripod got used on the few set-up shots I did. This appeared to work well, and though the wider angle of view of the GoPro (170 degrees) compared to the Contour (120 degrees) left me looking smaller in the frame than I expected, it did the job nicely. There was only one sequence I shot off the bike that I didn’t use as I was too far away.
The forth mounting option I made use of, as I have done many times with the Contour, was to hold the camera in my hand. This was good for different point of view shots of me than the front-mounted camera, shooting rear shots of other riders, the occasional detail shot of my bike and the landscape panning shots. Little bits like this are quite good to use – they’re easy to take on the move and can break up a larger sequence of POV shots to maintain interest.
Camera Settings
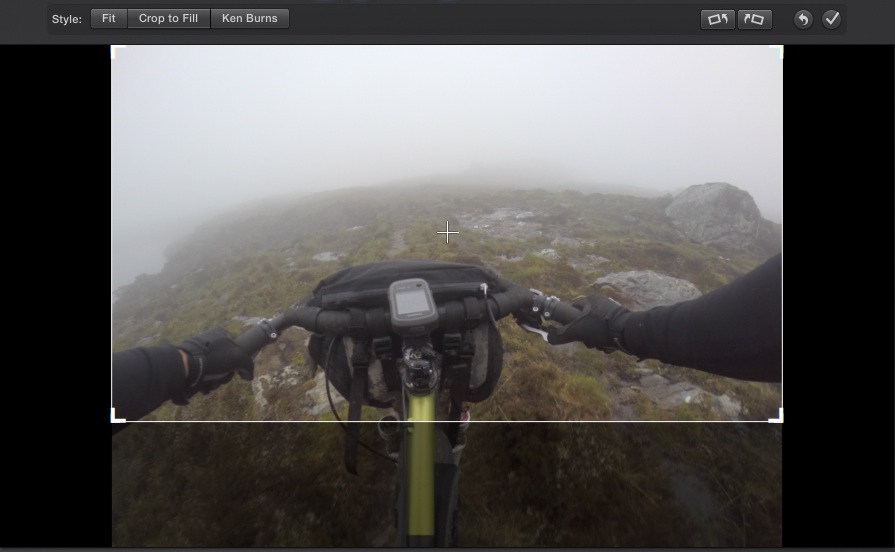
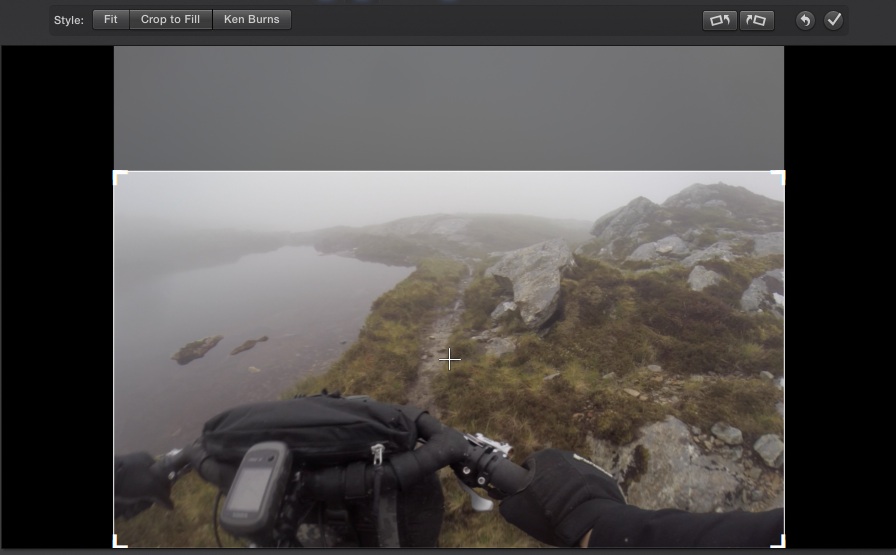
By chance, I stumbled across this useful little video on GoPro tips via MTBR. While my footage was going to be quite a bit different, the tip on resolution was a good one, and I set mine up to capture footage at 1920 by 1440 at 30 fps. What this does is capture more height as compared to the 1080 setting, giving you some scope to adjust the position of the final clip for the 1920 by 1080 aspect ration I would be editing the film in. As I found with the chest-mount in my first test before the event, the position you need when standing and seated is different if you want to maintain a view of the bars. This setting gives you a chance to correct that, as shown below, when you don’t have the ability to adjust the angle of the camera in the mount all the time.
Another little tip I used was to make a mark on the mounting point on the case with permanent pen so that aligned with a certain point on the chest harness clamp. With this, I could quickly reposition the camera in the chest harness and get the angle right. I even managed to take the camera off the harness, shoot some footage by hand and remount to the harness without stopping on the bike.
I also set the GoPro up for one button operation, so it should (in theory) be quicker to start and stop recording, and given that I only wanted to shoot video didn’t need to access any of the other functions once my settings had been configured. This was one area with the Contour performed better than the GoPro. Single button operation requires a long-press of the fiddly button on the front until it bleeps. It then bleeps at you four times quickly and after a pause and a fifth bleep, its recording. That takes about 4 seconds. The Contour has an easy to use slider on the top that once slid forward is recording – instantly. Consequently, there were several occasions where I wanted to start (or stop) recording on technical terrain where I needed to nearly stop to get the camera to do what I wanted.
In part 2, I’ll cover what I decided to shoot and some of the problems and opportunities that arose to capture certain aspects as I progressed on the route.

One Comment